Sunday, September 9, 2012

Spicy Thai Noodles

Bored with the regular menu, I made some spicy Thai noodles for dinner last week.

 This trick is one of the coolest things I have learned in the kitchen in a long time!  This is how you get  consistent spiciness to a dish:

Heat 1/2 cup sesame oil with 1-2 Tablespoons of crushed red pepper over medium heat.  
Separate the crushed red pepper, discard, and keep the now spicy oil.
(I used only 1T and it was perfect. Normally I enjoy a medium spice level in Asian and Indian cooking and I would pin this amount right on the nose in that category.)


Next add 6 Tablespoons of teriyaki sauce and a few Tablespoons of honey.
(A trick my mom taught me years ago is to counter act spicy food, sweeten it with sugar or honey.  So at this point, add more or less honey to balance out the spiciness of the oil - if you feel like you added too much pepper, add more honey and vice versa)


 The cooking instructions for the chow mein noodles told me to boil rapidly and to let it over boil, add a cup of cold water then cook until it over boils a 2nd time, 6-7 minutes.  Any type of noodle will do here, really.


Coat the cooked noodles with the sauce.  If you want to serve this cold, refrigerate the noodles before tossing with your toppings and do so just before serving.   Otherwise, keep on going.


Toss with chopped peanuts, shredded carrot, and sliced green onions then top with fresh cilantro once dished.


Enjoy hot or cold with a nice, crisp beer (if over 21, of course) to balance out the spicy.  Yum!


Sunday, August 19, 2012

Picture Frame Calendar (step-by-step)

A few weeks ago I came across this pin of a picture frame perpetual calendar and was determined to create one of my own.

I have envied all of the perfectly organized command centers out there and see this as a good beginning to our little family of me, my hubs, and our 2 pups. I am very visual and as much as I love my google calendar, something tangible and in your face at home is the best in my opinion. Plus, my husband can refer to this when he forgets my schedule at my second job even though I've told him a few times ;)

So the brainstorming began and yesterday I became inspired to utilize an old frame we had laying around that I picked up years ago from a rummage sale with a great watercolor that just doesn't fit in any of our rooms anymore.


Here is a step-by-step of my creation, using only these materials that I had around the house:
  • An old picture frame with glass front
  • White wrapping paper
  • Tape
  • Monogram and weekday letters (printed from our home computer using Word)
  • Pencil + eraser
  • Sharpee
  • Straight edge from the watercolor painting that was in the old frame
  • Ruler + measuring tape
  • Gluestick
  • Wood stain


Test sketches, playing around with orientation and the elements within the pieces. I started with the original concept, but ended up with my own version.


I stuck with a landscape orientation, mainly because the frame had a built in wire that hung it that way. Rather than "the Kane family," I decided on a simple monogram and then an unstructured space for notes.  Every month is different and I don't really care to write down our chores every month.  Maybe that will be needed when we have children that have their own chores but I think between the two of us we can figure it out in our heads on our own.  I also thought about how I wanted to leave the month space open for possible sketches and sayings pertaining to the current holiday theme.  Mainly, I wanted the canvas to be clean and simple.


Next, I attached the white wrapping paper with masking tape, pulling it as tight as I could.  I also double layered it so the text on the cardboard didn't show through.  Any type of paper, or fabric would do here.  If you opted for fabric, though, you'd have to do your calendar on the inside of the glass and that was just too much commitment for me.  


Next, I needed a straight edge to make my lines.  I measured out my outside corners and then drew line by line, measuring out 3" squares. The days of the week row was only 1" tall, however.  The original artwork that was inside the frame was perfect as it was definitely big enough and was a nice, sturdy weight so it didn't give as I went down the line.


Yes!  Perfect 3x3inch squares!


Next up, the monogram.
I cut out the letter "K" that I printed using Word.  I tried to keep on the black, leaving only a tiny bit of the white in the center to keep it together.

I then pasted it with a glue stick, getting every corner and edge to prevent future curling.


To make sure it was level and centered, I lined it up using my ruler before pressing down every edge.


Looks great!


I repeated this process with each circle representing the days of the week.  I highly recommend this simple version rather than an intricate small letter or word; unless you have stickers, of course.


And the calendar part is done! Next I took the old frame and stained it with a mahogany stain. 
The original frame was unfinished and water damaged, basically sad and blah


Now, it looks finished and richer.


 Here is the finished product, hung on my office wall. So far I love it! Now I want to schedule all kinds of activities! (as if I ever needed an excuse in the past - ha!)


Each entry has a different color, one for myself, another for my husband, plus a few other things. 


I really like how the section on the right for notes and things to remember/do turned out.


I stuck on one of those paper organizers that Post-It makes.  I had it originally just stuck on the wall but putting it here cleaned things up a bit and also filled in the bottom section so I didn't feel pressured to fill it if I didn't have anything to write.


Here is how it fits in with the rest of the items in my office.  What do you think?


Here, have a closer look!

The chalkboard I created using chalkboard paint and the lid to a file box.  It's great for quotes of inspiration or I have also used it for a countdown for our wedding.  On top is an Amazon gift card we received as a wedding gift that we haven't decided what to use it for yet - there is a world of goodies out there!  The books were a gift from my friend Leah for my birthday.  "Don'ts for Wives" filled with century old brilliance on how to be a good wife and "Love Poems" by Pablo Neruda, printed in English and Spanish.

Next are a couple of my floppy hats.  They say home is where you hang your hat and these are so cute I just had to put them on display!

The cork board is filled with coupons, reminders,and a few of my favorite pictures: me and my mom on Thanksgiving last year - a new tradition is I am head chef and she is my assistant!, the best picture in my opinion, of my dad - showing off his huge catch, and me as a toddler with my white blonde hair, osh kosh b'gosh, and first dog, MacMurphy. The ruler is another favorite piece which was hand-painted by my grandmother.  Painting wood crafts was one of her favorite past-times. We have a long line of artists and hobbiests in our family!

Sitting on my desk is a shadow box I put together when I was oh so smitten with my husband in our early days, a cute little owl oil warmer, and a bowl made by my friend, Tom, that keeps keys and now my dry erase markers for the newly added calendar.

The painting that sits on my easel was one of my first oil paintings that I will never get rid of.  I am so proud of this one!  It is a recreation of a Modigliani, one of my favorite artists.

Here is a home for all of our postcards, greeting cards, and invitations - it's been a year full of weddings and babies!

Another favorite childhood photo - too cool me chillin outside the Honolulu Zoo.

And finally, the coolest piece of furniture I own.  This mid-century leather futon was originally my aunt's that she picked out to complete her "Parisian apartment" inspired bedroom in high school.  My grandmother kept it when she grew up and moved out, and it was eventually passed down to me.

I hope you enjoyed getting a peek into my home office and maybe will be inspired to create your own picture frame calendar!  If you do, I'd love to see how it turned out - comment with your personal creation or link up and share your home office space!


Wednesday, August 15, 2012

Fresh Guava, Rainy Day Grilled Cheese, and a True Blood marathon

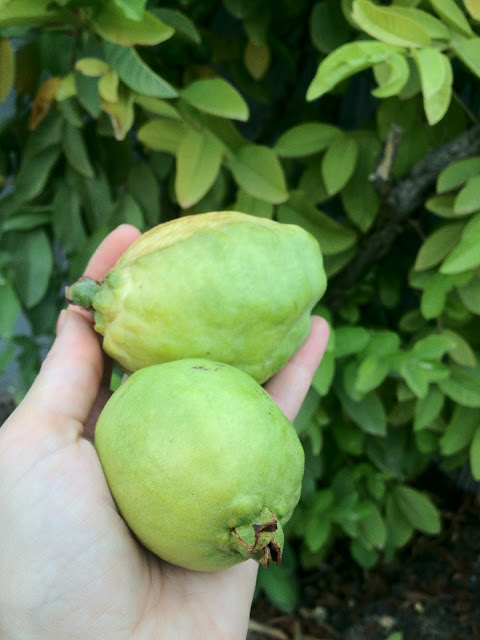
When we moved into our house the yard was already landscaped (so lucky!). One of the trees bore a mysterious fruit that I was guessing was guava after many google images scoured, but couldn't be sure as the one piece that I was able to pick was small an didn't really seem to ripen. The rest fell off before I could sample so I just figured I would wait until the next year, also guessing it was a young tree and would probably produce more fruit the next time around.

Well, the blistering Arizona heat is FINALLY letting off and we had a nice, cool 99 degree breezy rainy evening. I decided to enjoy the backyard, for this first time in months, and noticed the tree had fruit again. And I was right! This season there are about a half dozen! 2 were perfect for picking so I grabbed them, rinsed them of and cut one up. Looks just like a green apple on the outside (learned this is the variety) and is soft like a pear on the inside. The flavor? Not as beautiful as the smell but it's tasty. I am currently obsessed with smoothies so I think I will try one of these in tomorrow's concoction. Seriously though, these things smell incredible. The one sitting in our fruit basket has the whole kitchen smelling good!

The "cool" and rainy evening has me in the mood for a grilled cheese and tomato soup but I had to add some goodies. Love me some avocado, red onion and tomato with my melty cheese and toasty bread.

Top that off with a True Blood mini marathon and I call that a successful Wednesday evening!

Wednesday, August 8, 2012

Abstract Circles

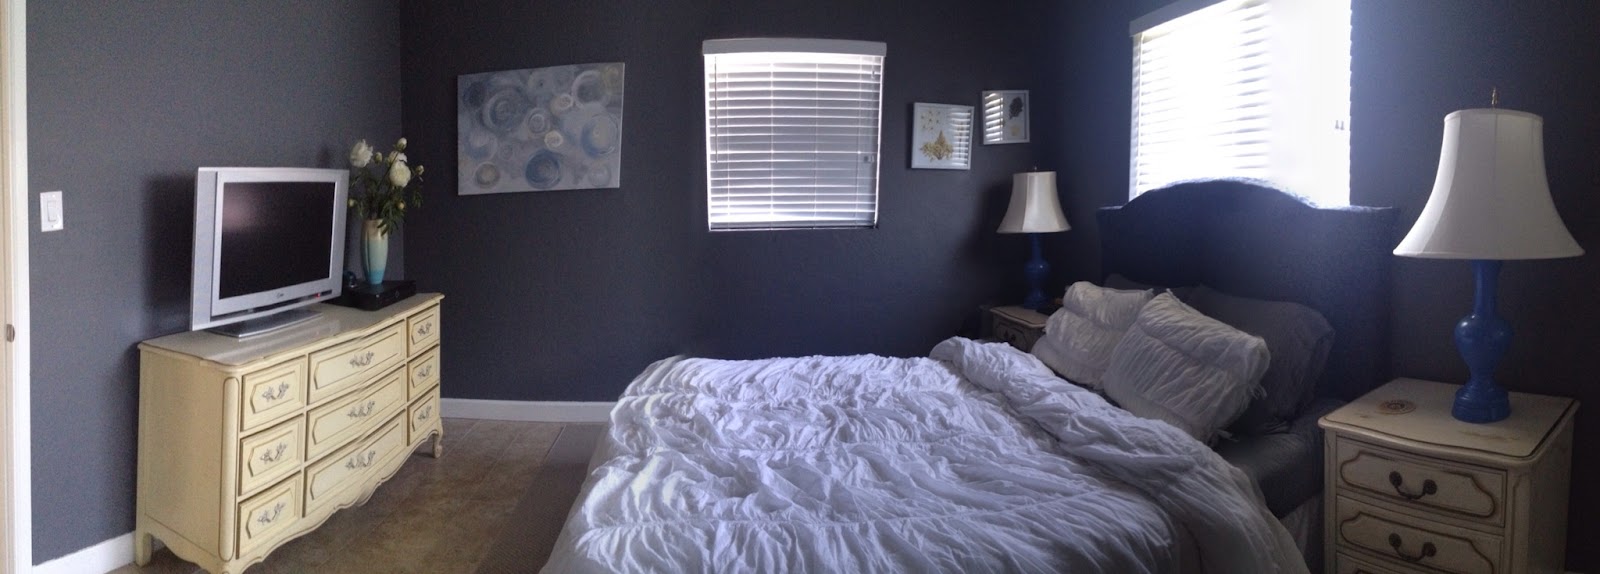
A painting for our bedroom.


The finished product on display


(photo taken with a panoramic app on my iPhone)

Sunday, August 5, 2012

Date Night


Considering we both had 6 a.m. shifts to look forward to the next morning, we spent our Saturday night out in the afternoon.  But what is there to do in the day when it is blazing hot outside and you actually want to hang out together rather than sit side by side staring at a screen either on the couch or in a movie theatre?  I know! 

An afternoon of playtime at Dave & Buster's!

Trivia, Horse races, Squirt gun races,  Fruit Ninja, and Time Crisis! What fun!


We have been saving up our tickets for a while and this trip we decided to turn them in for a prize. Expecting to only find trinkets and junk, we wandered through the store trying to think of something that was the least junky.  In one little corner we found probably the coolest prize in there: a Retro Handset for your iPhone!  Here I am testing it out in the bar.  Everyone got a kick out of it!  I think I want to use it in the car! So much fun!  I am seriously stoked to have this, though - don't you miss talking on a real phone sometimes?


After we used up all our credits and cashed in all our tickets it was time for some goodies and treats!  We stopped at one of those bulk candy stores and filled up a bag with some gummies, chocolates, and sweets.  It was really cool to see some of the oldies you loved as a kid, like PEZ and the ever cool "Freeze Dried Ice Cream" that Astronauts eat!  Brings me way back.  
Then we ended our afternoon adventure at an English pub for some Scotch Eggs - a first for me!  They were so good!


This was such a great time.  Simon working his new shift of afternoons and evenings off is proving to be awesome!  Hopefully we can get out to do more things together from now on.  :)

Friday, August 3, 2012

Black Bean Enchiladas

Last night we had our good friend over for dinner and served black bean enchiladas. So yummy and easy to make!

I cooked the beans all day in the crockpot with a half an onion, chopped, 2 slices of cooked bacon & their drippings, and about 5 cups of water. (I did a quick soak in the morning by boiling the beans for about 10 min on the stove.)

Mixed the beans with some enchilada sauce and mozzarella cheese for the filling.

Cooked 11 tortillas in oil to soften and bring out the corn flavor (this batch I used JalapeƱo Cilantro corn tortillas - they gave it a nice kick!) and set them aside on paper towels.

Filled each tortilla with 1/4 c o the bean mixture, rolled, and placed open side down in a 9x13 pan.

Top each enchilada with a little bit of sauce and then make a line of mozzarella cheese on top of all of the enchiladas. Cover with foil and bake for 20-30 min.

GREAT to make ahead so you can entertain for a while before eating. I timed it to be ready when our guest was to arrive at 6:30 but just turned off the oven and let them sit until we were ready to eat around 7 or so.

Another favorite in my recipe box!


Tuesday, July 31, 2012

Green Smoothie

A new found favorite morning snack packed with protein and vitamins that is super yummy. You can barely taste the spinach, I promise!

Greek yogurt, plain - about 2 big spoonfuls. (be sure to use plain Greek - Greek is lower in fat, higher in protein and the plain will save your carbs from sugar for the fruit. Regular or flavored yogurt diminishes the health factor this smoothie provides immensely)
Banana
4-5 strawberries
Simply Orange Juice, 1/2c more or less to preferred consistency (or any fruit juice that is 100%, not from concentrate)
2-4 handfuls of fresh baby spinach

Blend and enjoy!